Designing a Stunning Jellyfish Cufflink: A Step-by-Step Guide
Ever wondered how to turn the delicate beauty of a jellyfish into a stylish cufflink?
In this article, we’ll explore the creative process behind designing a unique jellyfish cufflink, from initial concept to finished product. Dive into the world of accessory design and discover how a simple idea can transform into a wearable work of art.
1: Gathering Reference Material
From Inspiration to Concept
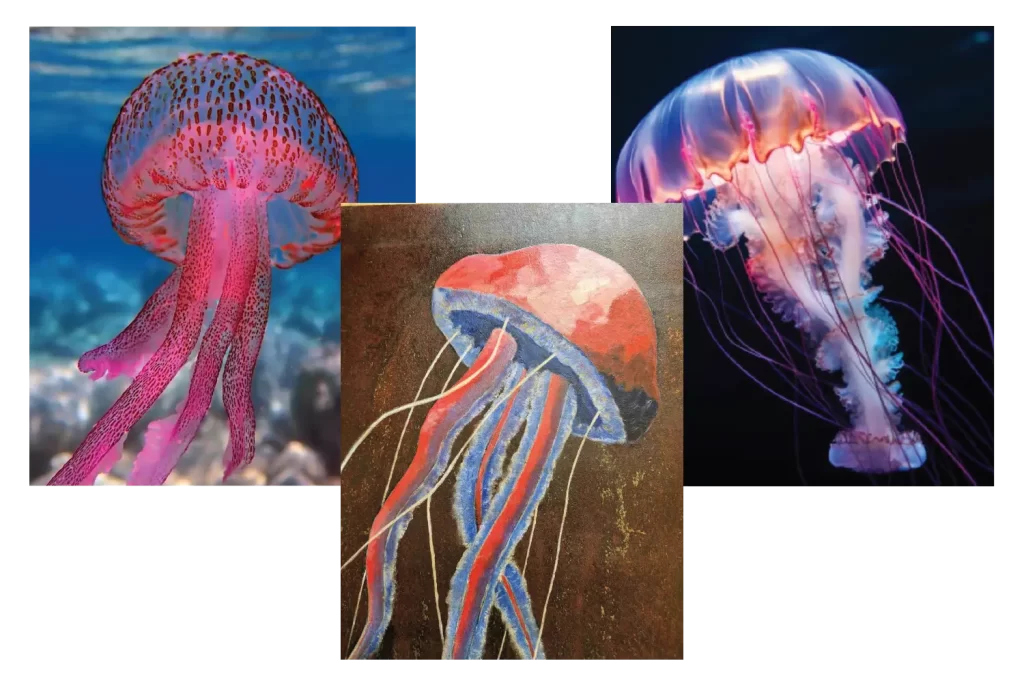
The initial step to designing any jewellery accessory is to gather useful reference material. This enables key features to be picked out such as shapes, textures, and colours to carry through into the final design.
For our jellyfish cufflink, we wanted to focus on the complex structure and the vivid colours we see in nature. The jellyfish cufflink should have a transparent quality around the body and plenty of texture details.
The Jellyfish in nature has two distinct parts. The twisting, flowing arm tentacles are a key feature we wanted to pick out to create the sense of drifting on the ocean currents. The large domed bell-shaped body is also a key feature of any Jellyfish.
Click here to read more on jellyfish.
2: Sketching and Conceptualizing
From Paper to 3D Digital
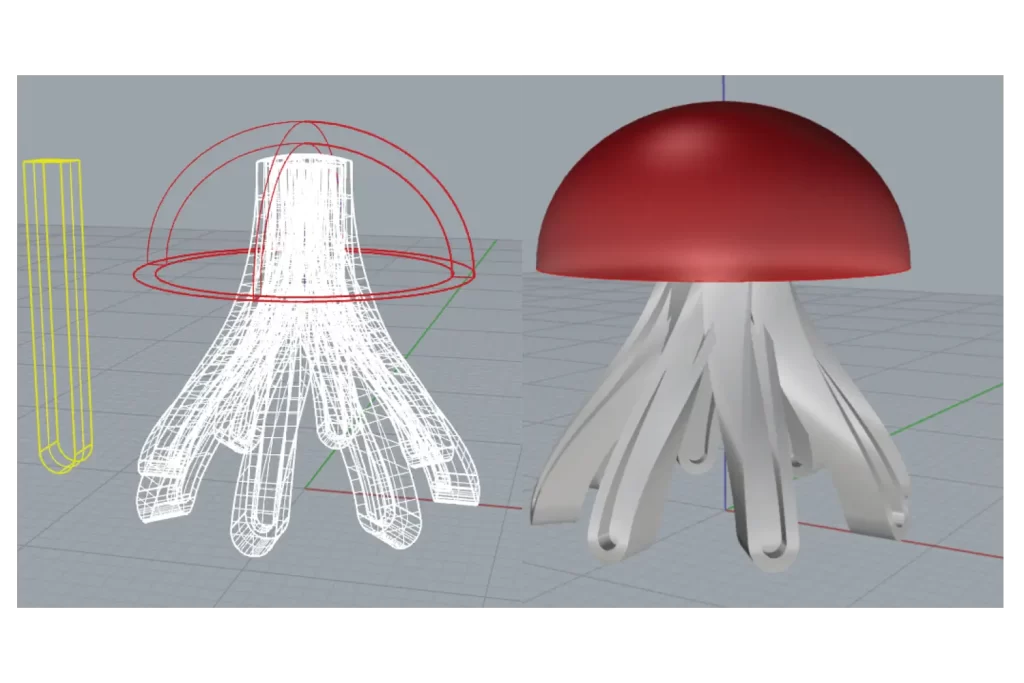
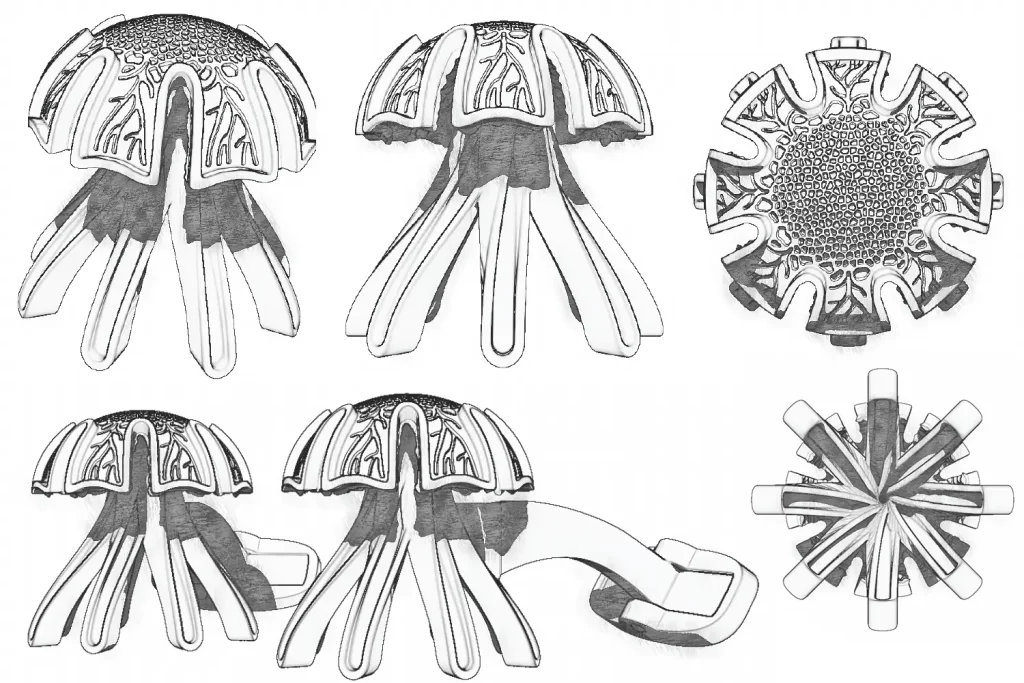
Sketching ideas helps in understanding the 3D form without manufacturing restrictions. The first step is to work out how to incorporate colour. Our sketches highlighted a recessed section to hold colourful enamel around the bell-shaped body. Use of transparent enamel in this example also allows some texture details beneath to be visible.
The flowing tentacles featured detailed textures to hold more colour and were also shaped and twisted to offer metal detail. However, it became necessary to limit the number of arms & tendrils to avoid making the cufflink too bulky. The arms being regular and the same length would also allow the cufflink to stand in the box.
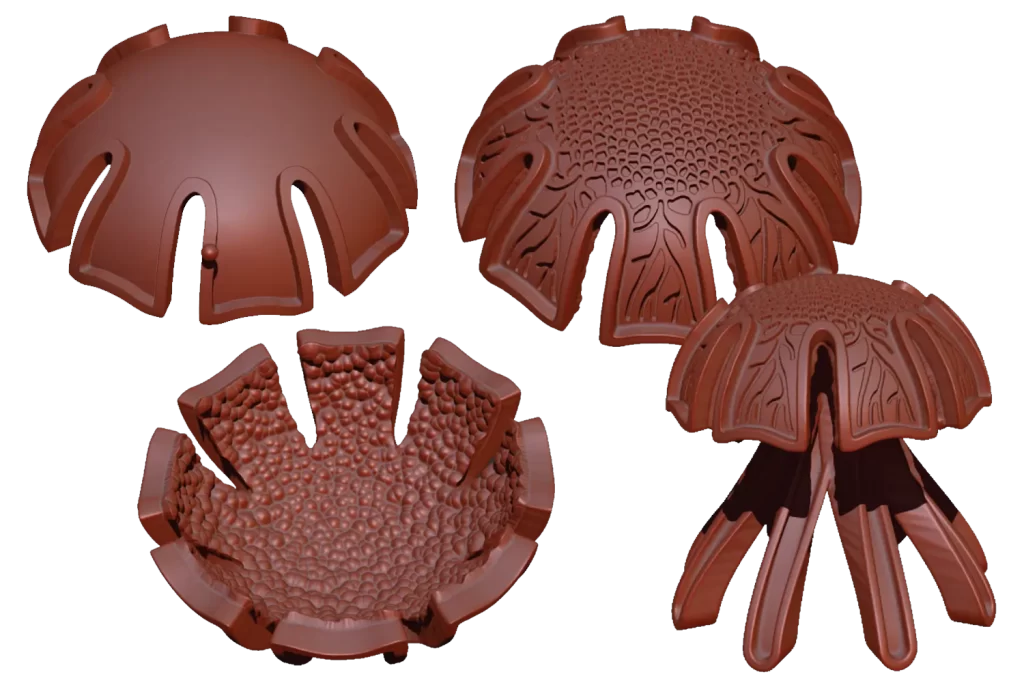
We Blocked out the design in simple geometric shapes using NURB/UV-based CAD software, then added organic details in a Polygon/Mesh-based software. At this stage, it is useful to try different textures and details. This is also the stage to consider manufacturing problems. For example, is the design deep enough to hold enamel, and is the metalwork thick enough to be cast properly without deforming?
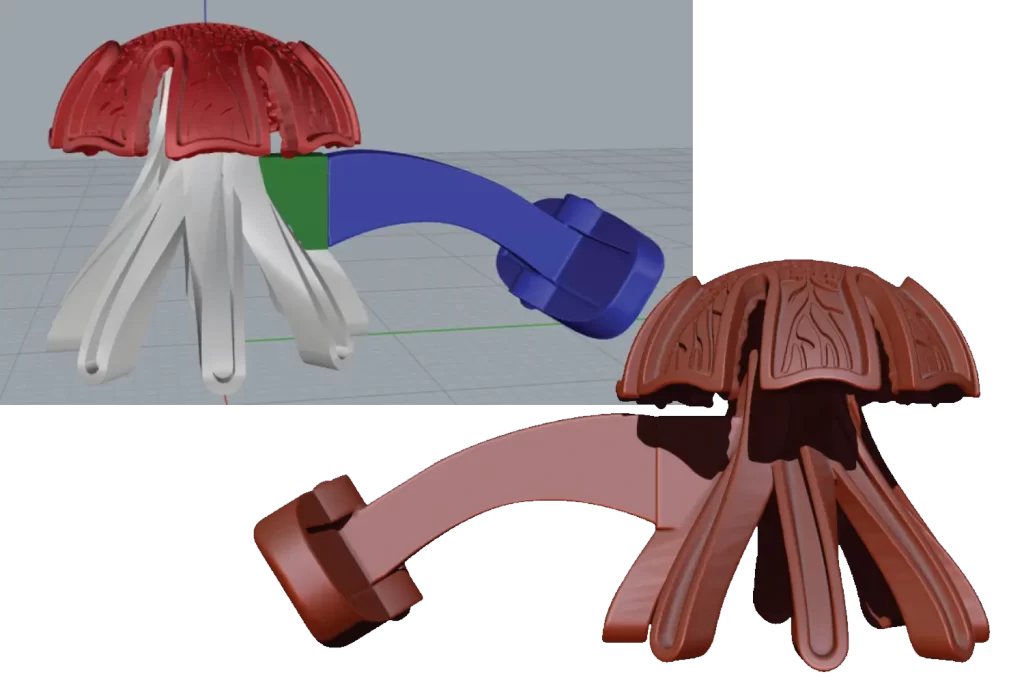
The details are then cut back into the design at a depth to ensure that they will be retained when the design is 3D printed and cast.
Click here to see more case studies.
3: Prototyping and Refinement
Perfecting the Design
Once satisfied with the digital model concept, the design is built using 3D printing. This build becomes the basis for the master pattern from which the casting mould is produced. It is important to make sure that the master is 5~6% larger to account for shrinkage during the loss wax casting process.
It is important to check at this stage that the textures and details are good, ensuring they remain impactful after 3D printing and casting. Hidden surfaces are also given a durable texture to mask manufacturing marks. In this case, the castings are Brass as it’s a great metal to work with. We could also make these cufflinks as Sterling Silver from the same mould.
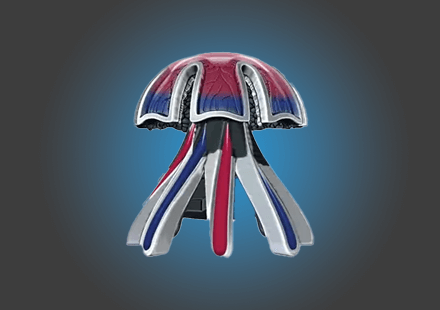
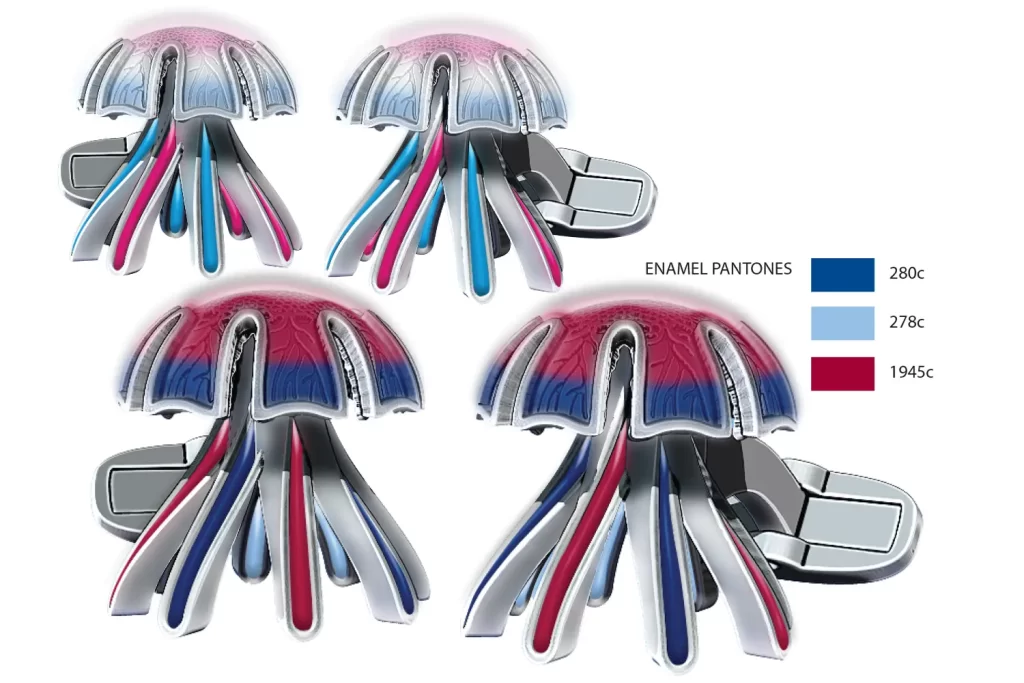
Choosing the Perfect Palette is important, as is the use of transparent enamels. The jellyfish from the reference material showed the natural palette of pinks, blues, and whites. But in this case we adjusted the colours to burgundy, navy, and sky blue for a more vibrant colour palette. Transparent enamels can be tricky to get the correct colour tone and maintain the transparency of the enamel. The colours in this jelly fish are also blended together in one enamel section to make it more organic and truer to life. This also makes each link individual.
Click here to see more examples of Cufflinks

4: Finishing Touches
A touch of aquatic elegance
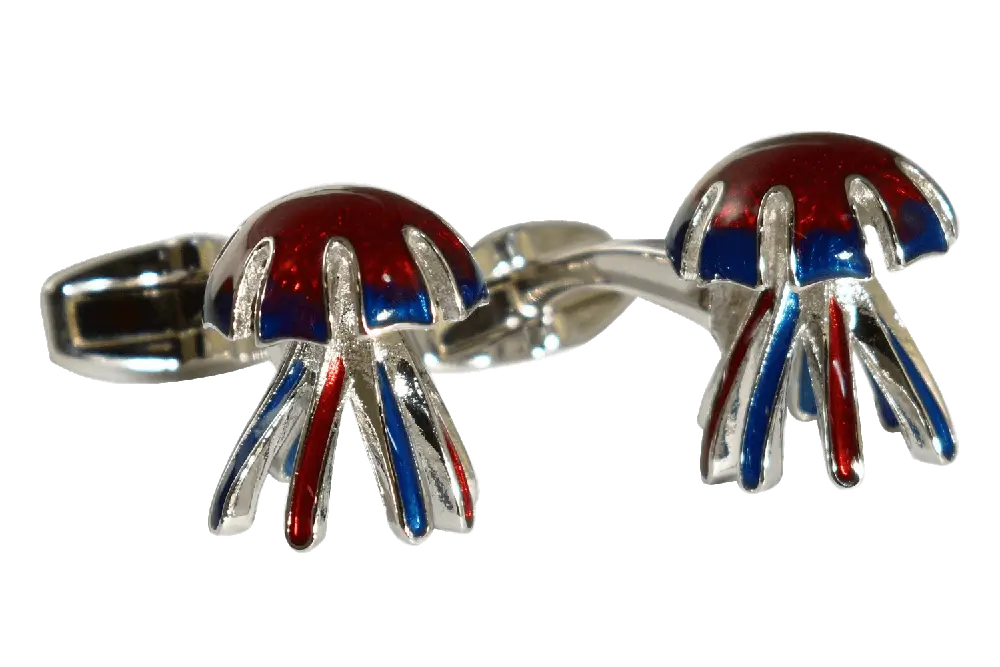
The fitting is a ‘whaletail’ design, with a sprung mechanism that will open and close for easy use on a shirt. The stem is soldered to the casting, and back-part assembled. The link is hand-polished before the enamel is applied. The plating process applies layers of silver and palladium.
The enamel is applied by hand and hand-polished to a high-shine glossy finish.
After quality control the cufflinks are placed in a leather presentation box. For example, this product would be sealed and barcoded, and ready to be shipped to the stores.
In conclusion
As you can see, designing a jellyfish cufflink involves creativity, precision, and a deep understanding of materials and manufacturing processes. With over twenty-five years of experience, Merit is proud to bring such intricate designs to life. These jellyfish cufflinks are sure to make waves!
Get in touch to see if we can help with your concept or project. We’d love to hear your ideas.
FAQ
Can I buy a pair? – Yes! Contact us and you can own a pair.
Can you use this vibrant blended transparent enamel technique in other designs ? – Yes !
Can you use this design and change the colours? – Yes! That’s is the best thing about enamel. the possibilities are endless.
Why did the jellyfish cross the road? To get to the other tide!